Words by: Joseph Lew
Art by: Ruth Ong
We’ve all had our own projects during lockdown. Some of us are baking sourdough. Some of us are learning to play the piano. And some of us are trying to fit 30 hours of sleep into a 24 hour day.
Me? I’ve been living out my cottage-core dreams: making jam, growing cauliflower and recycling dilapidated timber pallets into a series of fenced vegetable beds. Next on my list, an indoor compost bin.
In Victoria alone, more than a quarter of a million tonnes of food are thrown away each year. Food waste in landfill decomposes anaerobically, releasing methane and other harmful greenhouse gases into the atmosphere. Composting provides a solution to this, by reducing the total amount of waste which goes to the dump, providing an organic source of plant food in the process.
I mean I could have just bought a Bokashi Bin, or any of the other pre-made compost bins on the market. But of course, as the project-loving, idle-hands-are-the-devils-playthings monomaniac that I am, I decided to make my very own.
There were several things that this bin had to do. Firstly, it had to be a decent size, something I could sit in the corner of my hallway, or tuck underneath the laundry sink when I inevitably got sick of looking at it. Secondly, it had to be easy to make and use. Thirdly, low maintenance — little aerating and turning necessary. And last but not least, it couldn’t smell. This was a big one.
That’s when I stumbled across Hiroko Tabuchi’s method. Widely used in Japan, this method relies on aerobic decomposition to function, with naturally occurring microorganisms using oxygen to break down organic waste. As such, the process neither smells, nor produces any slimy by-products. Tick, tick and tick. I decided to give it a shot.
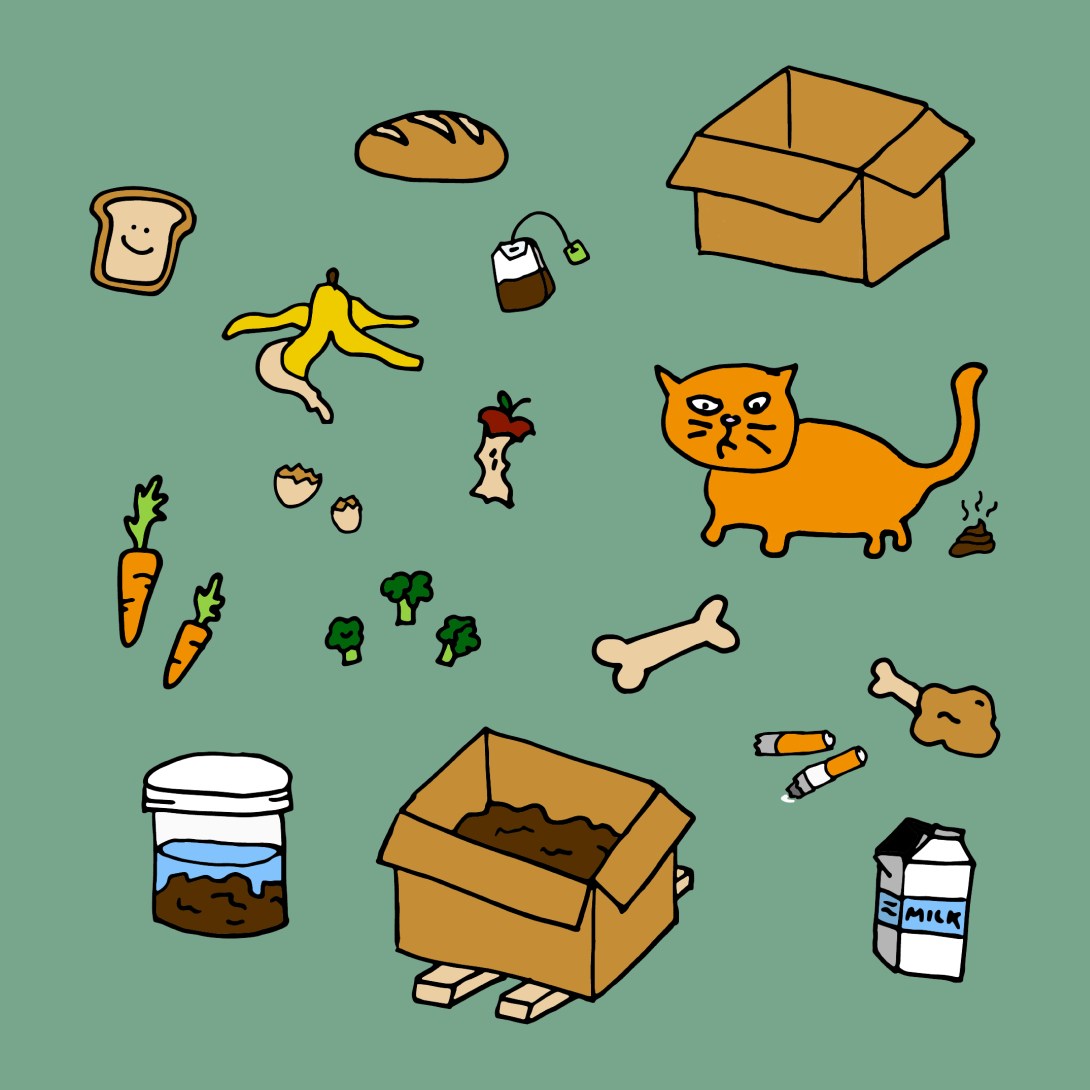
This bin only calls for five things: a sturdy corrugated cardboard box (preferably with a lid), some additional
cardboard, biochar, a block of cocopeat, and some spare plywood or wooden blocks. One trip to Bunnings and a scavenge in the garden shed and I was good to go. Note: If you can’t find biochar, grab a hammer and smash up some horticultural charcoal until it turns into a fine powder instead. Make sure you wear a mask for this.
To make the bin, what you’re going to need to do is start by soaking the cocopeat brick in water, as per the instructions on the back. While this is happening, reinforce the base of the cardboard box by adding an extra sheet or two of cardboard to the base, and tape up any loose sides. Then, sit the box on top of something to keep it raised, to allow for proper air circulation, and prevent the base of the box from dampening — I used two blocks of scrap wood for this. Once the cocopeat has fully expanded, squeeze out any excess water and fill the box to about halfway with a 3:2 mix of cocopeat and biochar. If unlidded, cover the box with shade cloth or breathable fabric to keep out insects and other vermin. Simple.
Using the bin is just as uncomplicated. Food scraps can be added at any time, and a garden trowel can
be used to break up any large scrap pieces, and to stir the compost-mix. If the substrate starts to
dry out — you’ll know this is happening when the cocopeat starts to lighten in colour — add some water to the compost and give it another stir.
If you’re wondering what can be composted, vegetable and fruit scraps, tea and coffee grounds, bread, pasta, rice, eggshells and noodles are a go. Stay away from anything with a high salt content, animal bones, dairy products (trust me on this one), and anything that you’d assume shouldn’t go into a compost bin — don’t go using your compost bin as an ashtray. Follow these steps and you’ll have a well-functioning and unassuming compost bin in no time!
